Introduction to using Git in JupyterLab
There are two ways to work with git projects in JupyterLab. You may either use the git extension for JupyterLab for a point-and-click interface, or issue git commands directly on the command line.
Setup
As of October 1, 2020, all new repositories created on GitHub will have a default branch called main. Previously, the default name was master. The change was made to promote inclusive language in the version control world. SESYNC has updated the GitLab server to match this new default. However, the git client will still default to master if you create a repository locally, unless you configure it as described below. You should also be aware that any documentation, tutorial, or StackOverflow post written before 2020 will assume your default branch is called master.
If you are doing this lesson on your local machine, we recommend setting the default branch name for new repositories you create to main. Enter the following into your terminal prompt. You can access the prompt from JupyterLab’s Terminal tab.
git config --global init.defaultBranch main
Next, set your name and email in git by running the following commands on the terminal.
git config --global user.name "FirstName LastName"
git config --global user.email "email@example.com"
The email address used should match the email address of your GitHub account.
Start JupyterLab
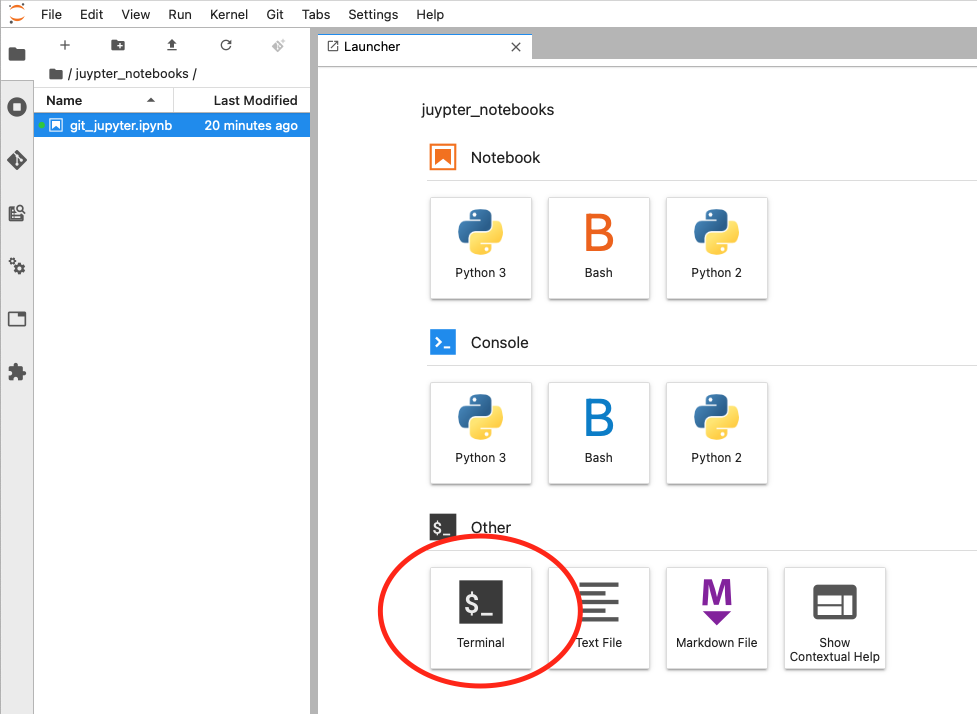
Start the terminal from the JupyterLab launcher.
- Log into SESYNC’s Jupyter Server.
- Go to File -> New Launcher.
- Click on Terminal. The terminal will open in a new tab.
Create a new repository
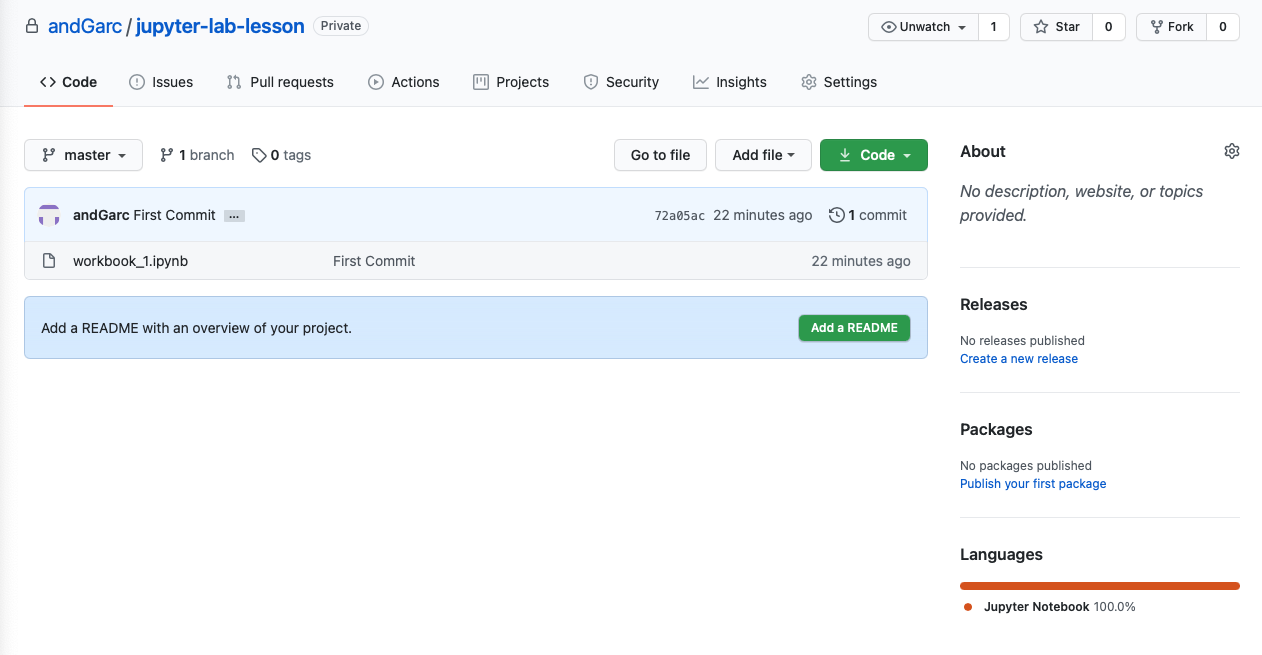
Create a repository on GitHub.com. Once created, you’ll see a page like the one below.
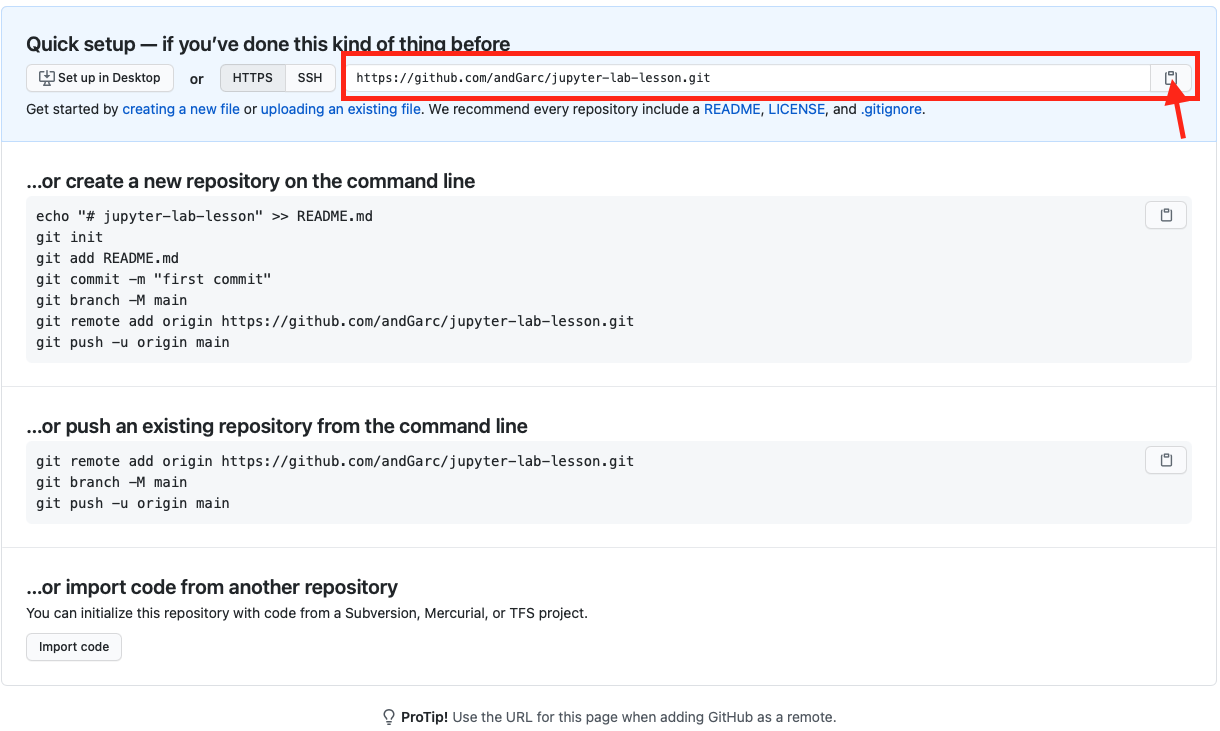
Copy the highlighted repository URL which you will use to clone your remote repository.
Point-and-click interface
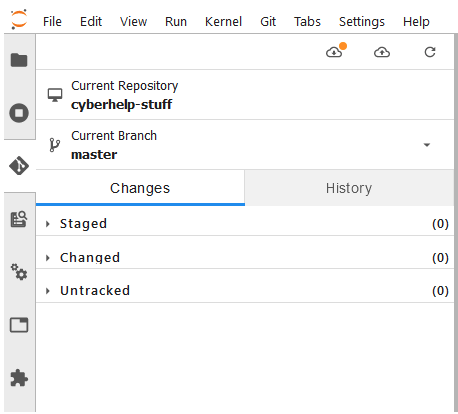
SESYNC’s Jupyter Lab server has the JupyterLab git extension enabled. The extension is a user-friendly add-on for JupyterLab that lets you do basic git actions with a point-and-click interface. Access the extension by simply clicking on the git icon on the left-hand side of your screen in Jupyter Lab (you should see something like the screenshot below).
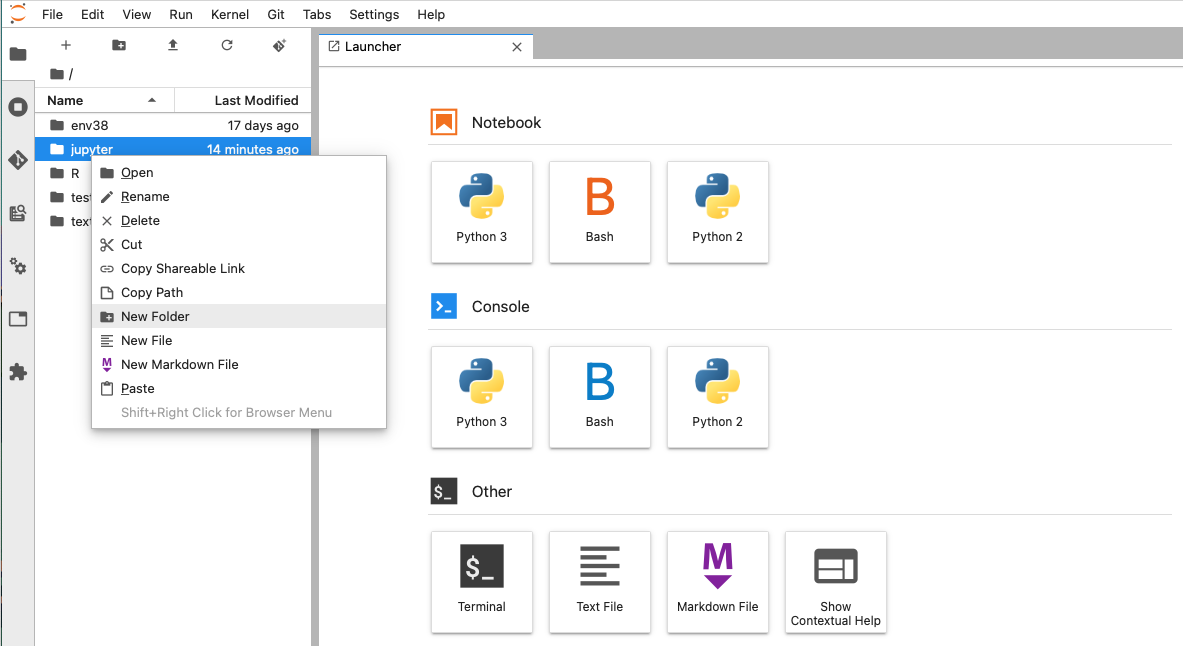
Create a new folder
- Click on New Folder and name it.
- Navigate to the new folder.
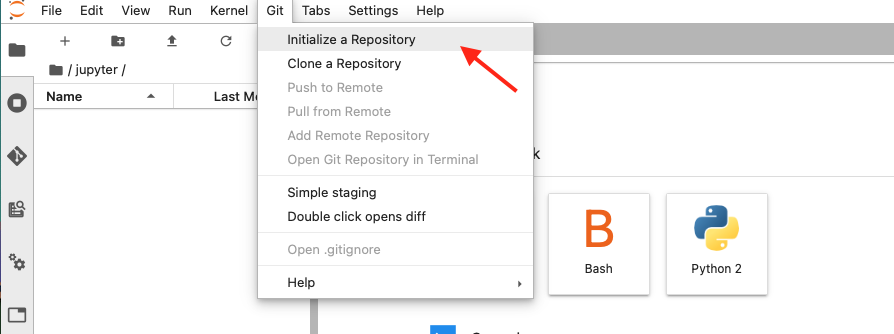
Create a local git repository
-
Under the git extension tab click Initialize a Repository.
-
Click yes to confirm and initialize the folder as a git repository.
Congrats! You have initialized a new git repository by using the git extension.
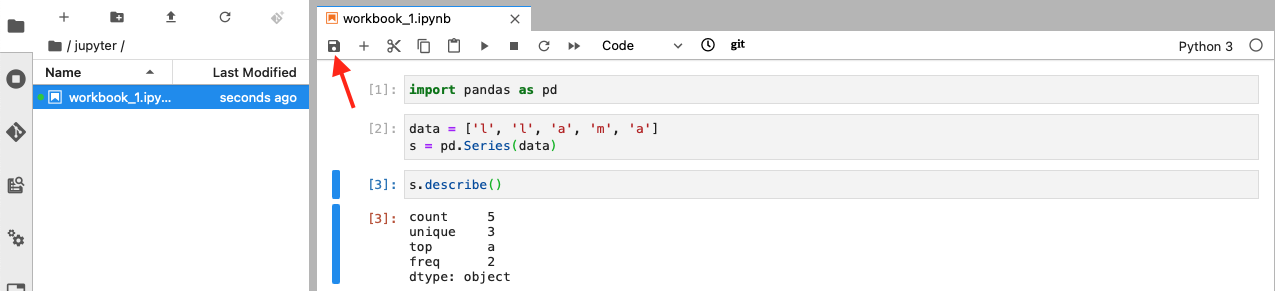
Do some work
Now, it is time to do some work by adding a new notebook.
-
Go to File -> New Launcher -> Python3 and start a new notebook.

-
Work, edit, and save your notebook.
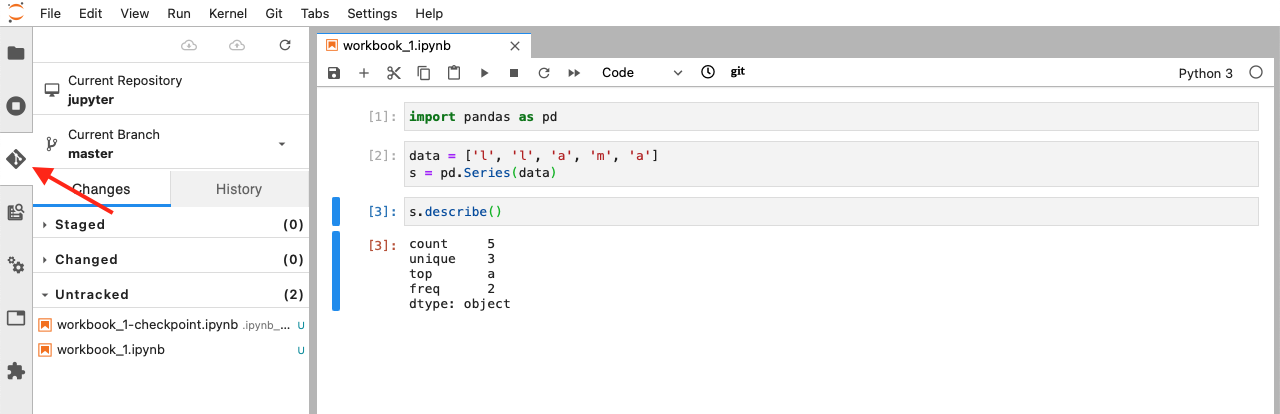
Stage and Commit your work to your local git repository
You are now ready to commit your work.
-
Click the git extension tab on the side panel.
-
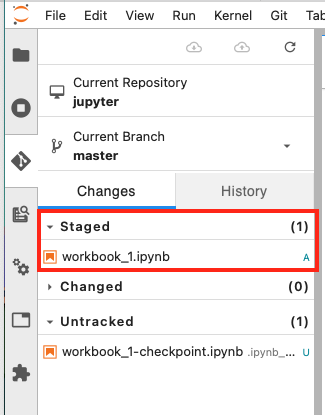
Track your notebook by clicking on the plus sign next to its name.
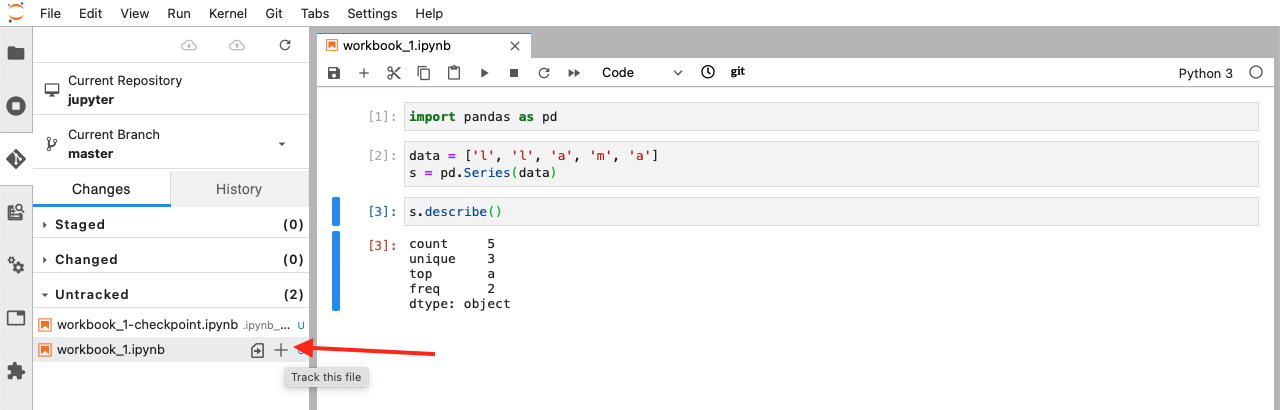
You have staged your notebook. You will notice that it is now under the Staged section.
- Add a title and a brief message description.
-
Click Commit.
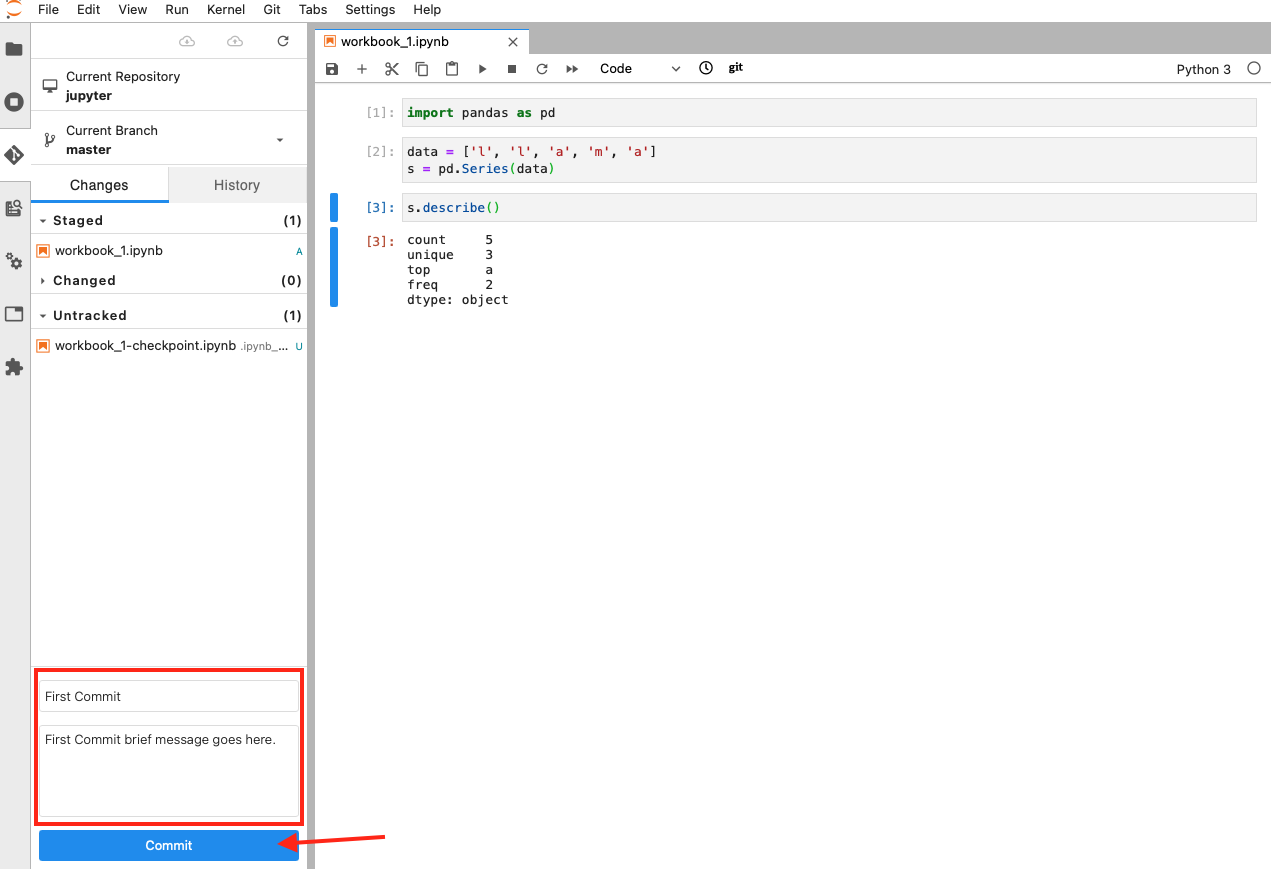
- If prompted enter your name and email. Once the commit is succesfully completed you will see a green message box popup from the bottom right corner.
Congrats! You have now succesfully completed your first commit!
Link your local repository to your GitHub repository
- Under the git extension tab, click Add Remote Repository.
-
Paste the remote repository’s URL and click OK.

-
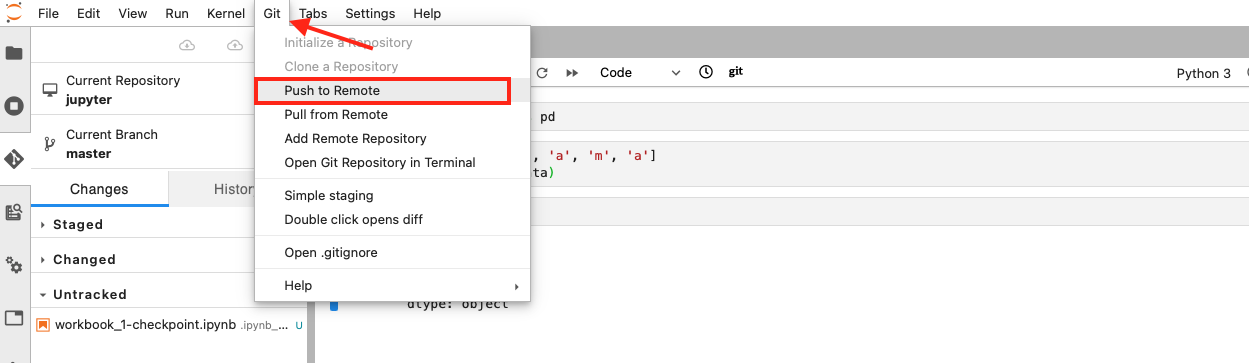
Go to the git extension tab and click Push to Remote.
-
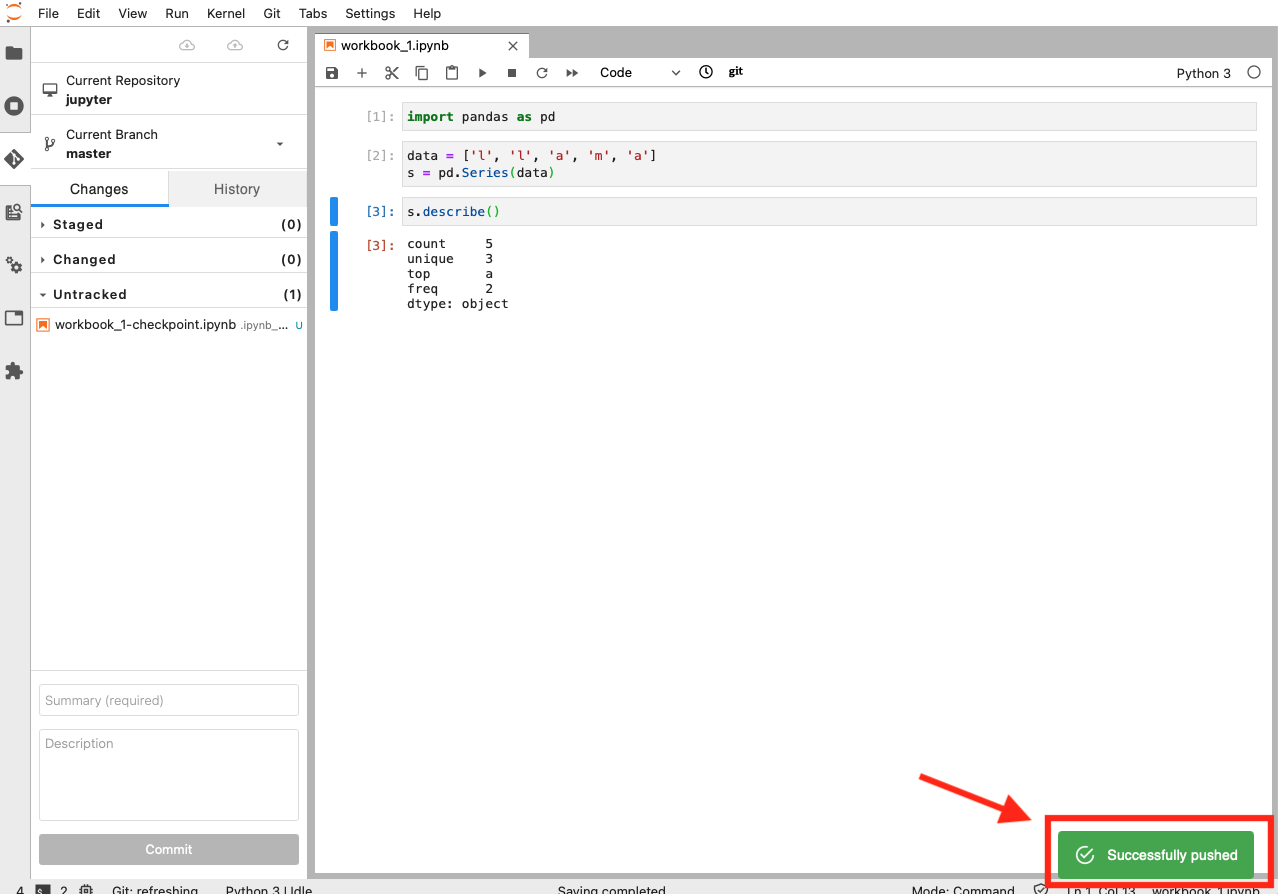
If prompted, enter your username and password for your remote repository and click OK.
You will see a successful push message once the push has been completed.
You can visit the project’s GitHub repository and see your commits.
Push Notebooks to GitHub
Let’s say you have added new changes to your notebook and you would like to share these changes with your collaborators by pushing your work to the remote repository on GitHub.
- Follow the previous instructions to stage and commit your changes on your local repository.
-
Push your changes to your remote repository by clicking on the cloud icon with the up arrow.
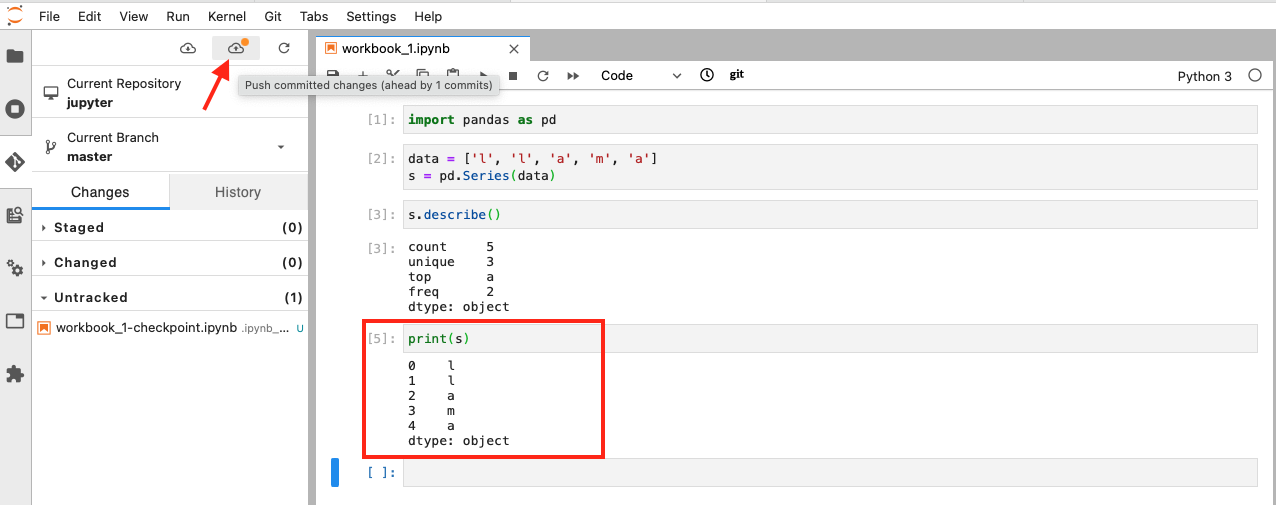
- If promted, enter your username and password.
You have successfully made changes to your notebook and pushed these changes to the project’s remote repository!
Command-line interface
If you prefer to use git on the command line, here is how you can clone your remote repository, stage, commit, and push your local changes.
Open the Terminal on the Jupyter server
- Log in to SESYNC’s Jupyter server.
- Open the Terminal: File -> New Launcher -> Terminal. You will be in your home directory (
/research-home/userName). - (Optional) If you want your repository subdirectory to be in a different directory, use the
cdcommand to navigate there.
Clone a repository
- Clone your remote repository. This will create a subdirectory
my-repo-namefor the repo in your current directory.userName@juplab00:~$ https://github.com/githubUserName/my-repo-name.git - If prompted, enter your GitHub username and password. We suggest you use SSH for the URL to avoid having to repeatedly enter your log-in credentials. If you’re not sure if you’ve set up SSH authentication, see these GitHub instructions.
- Navigate into the newly cloned repository by using the
cdcommand.ls # lists the names of the folder in your current directory cd my-repo-name # navigate into the cloned repository
You have successfully cloned your remote repository. Congrats!
Next we will go over how to add your notebooks and files from your local to your newly created remote repository.
Push Notebooks to GitHub
Your repository is empty right now. Let’s push a notebook to it.
- In your project folder create a new notebook by going to: File -> New Launcher -> Python3.
- Name the Python notebook.
-
Do your work in the notebook and save it.
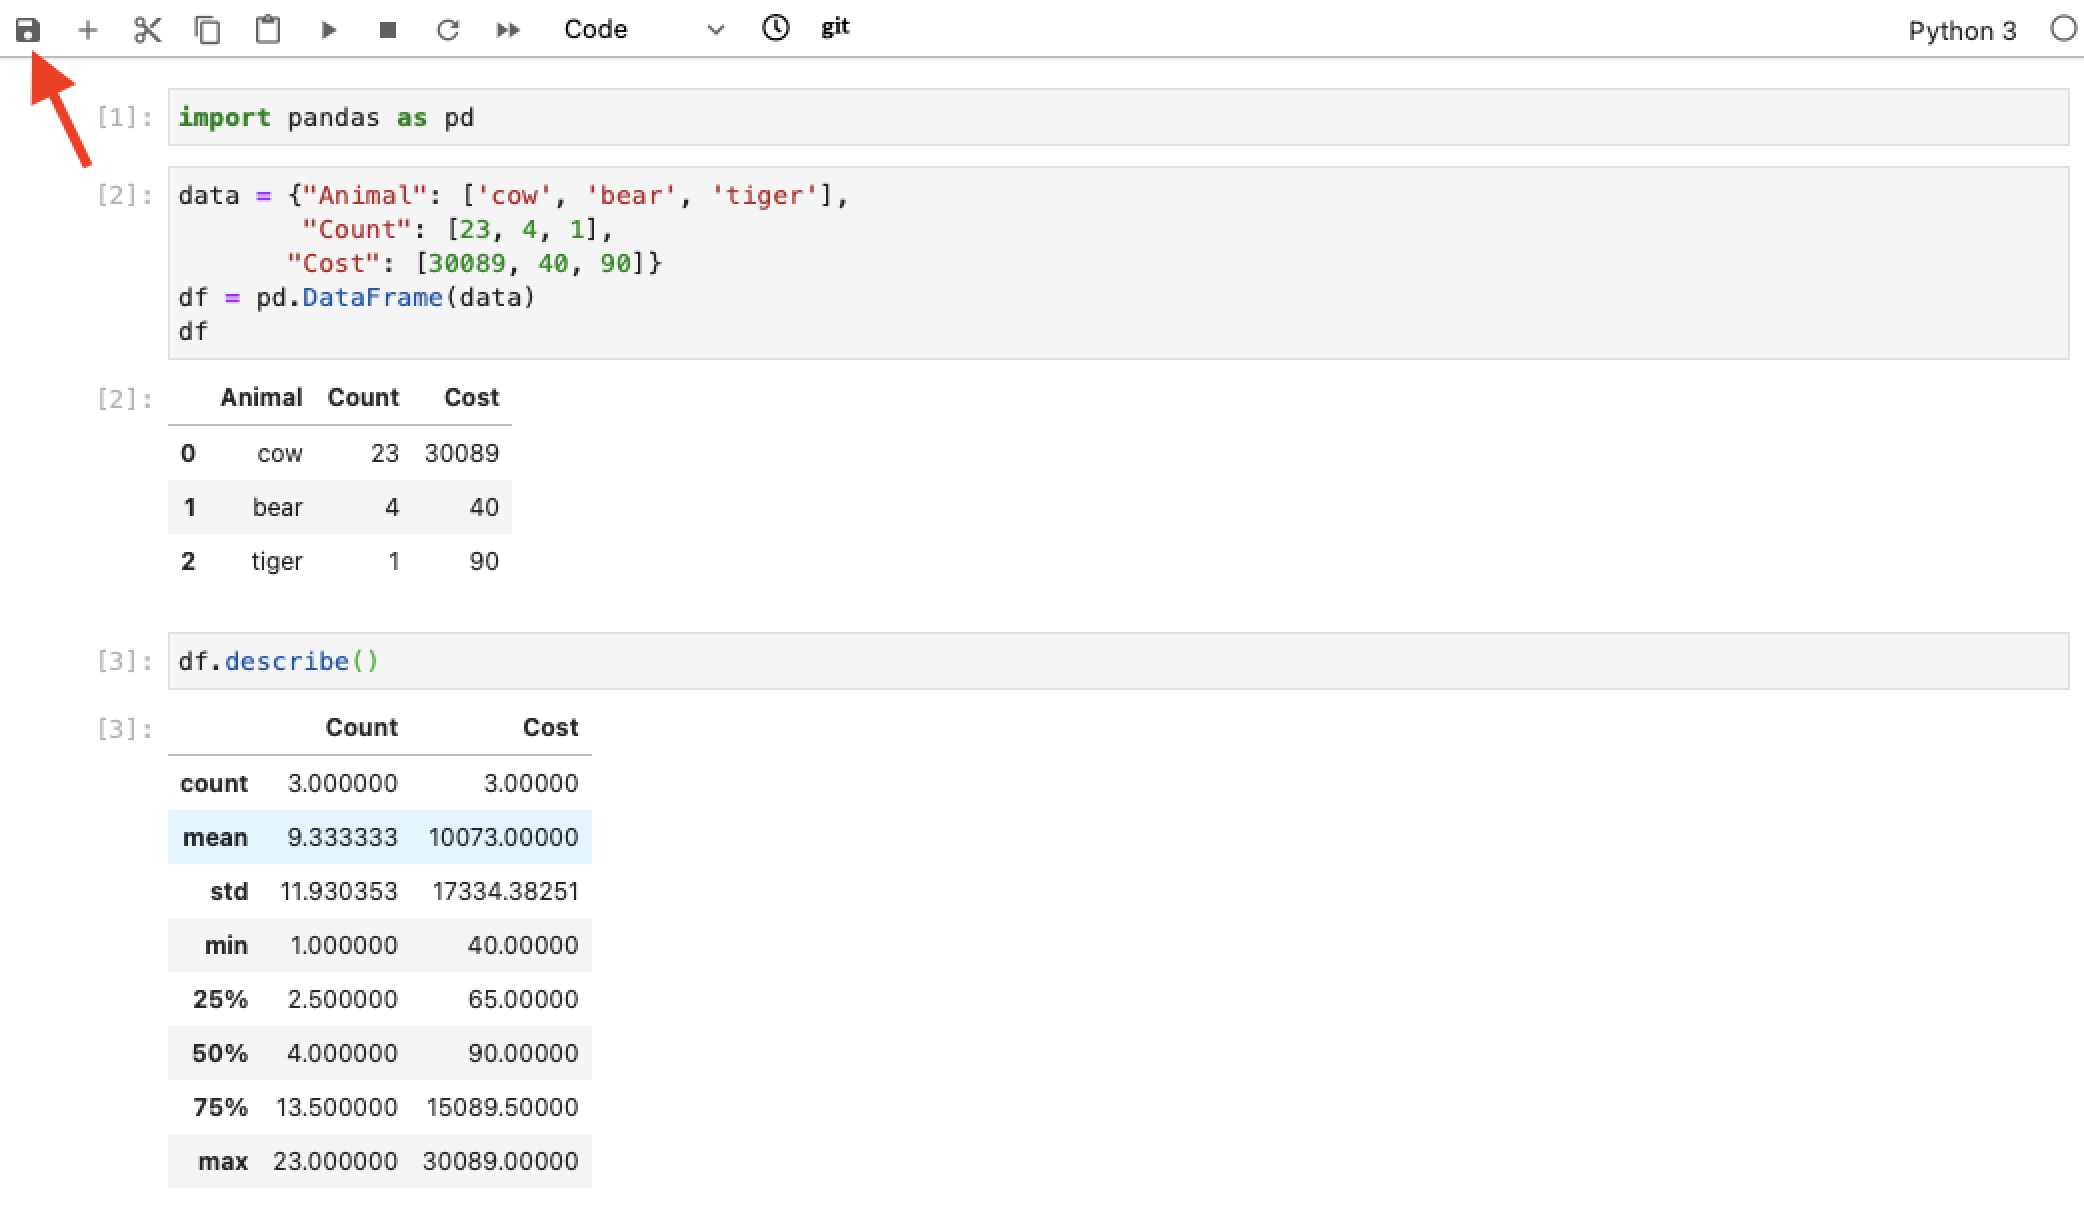
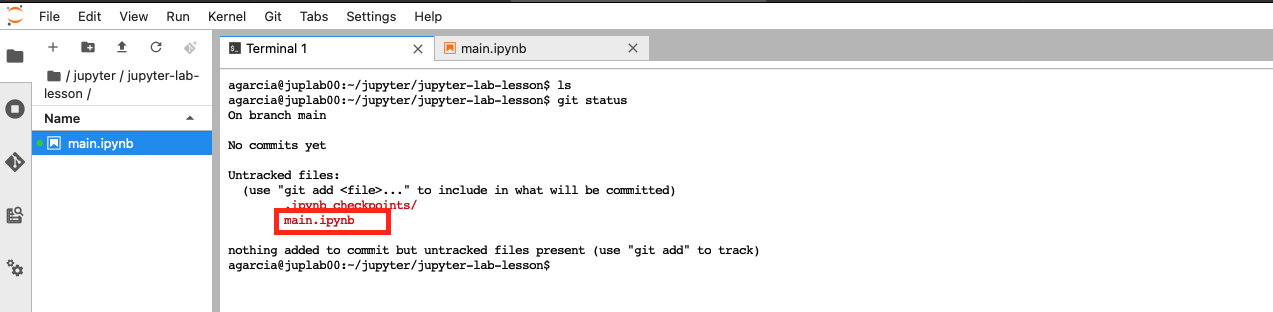
- Go to terminal and check the status of your repository.
git statusYour file will be listed under “untracked files.”
- Stage your changes with
git add <filename>.git add main.pyYou can check which files are being tracked with
git status. You can see thatmain.ipynbis being tracked.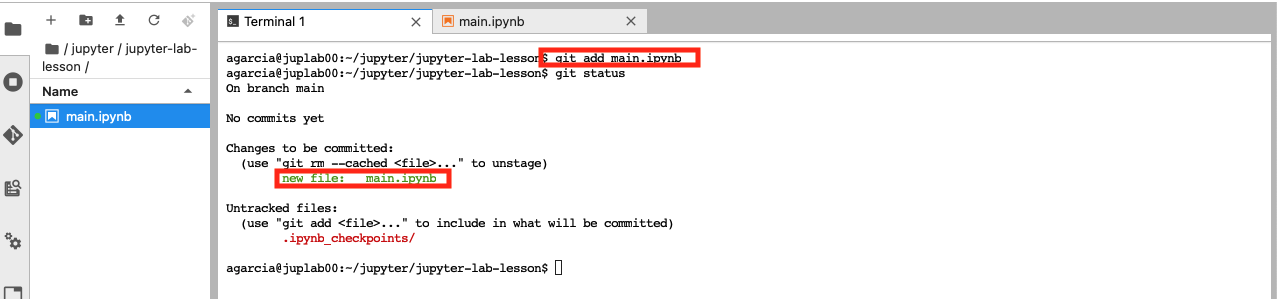
- Commit your changes with
git commit -m "Commit Message Here".commitcreates a checkpoint that you can revert back to at any time.git commit -m "Descriptive statistics."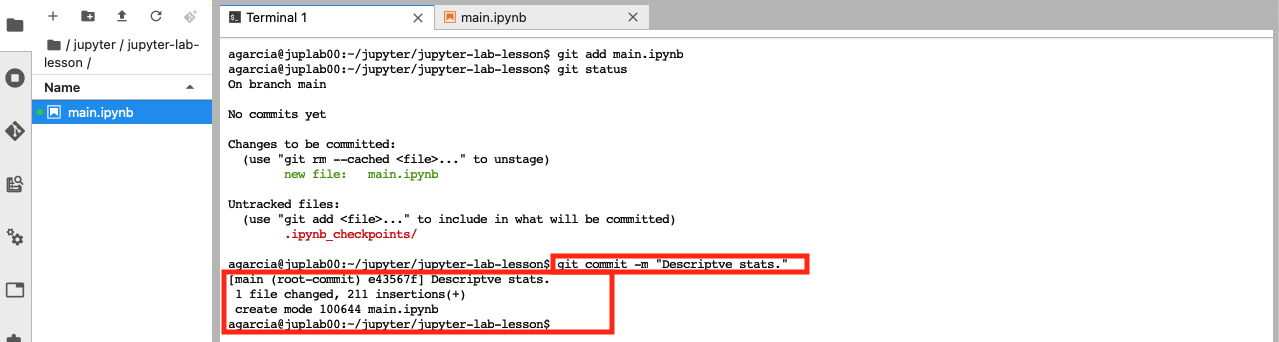
- Pull down the current version of the repository from GitHub.
git pull origin main - Push your changes to the project’s Github repository.
git push origin main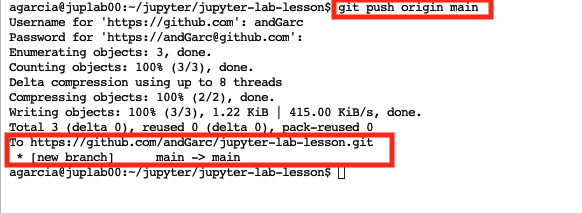
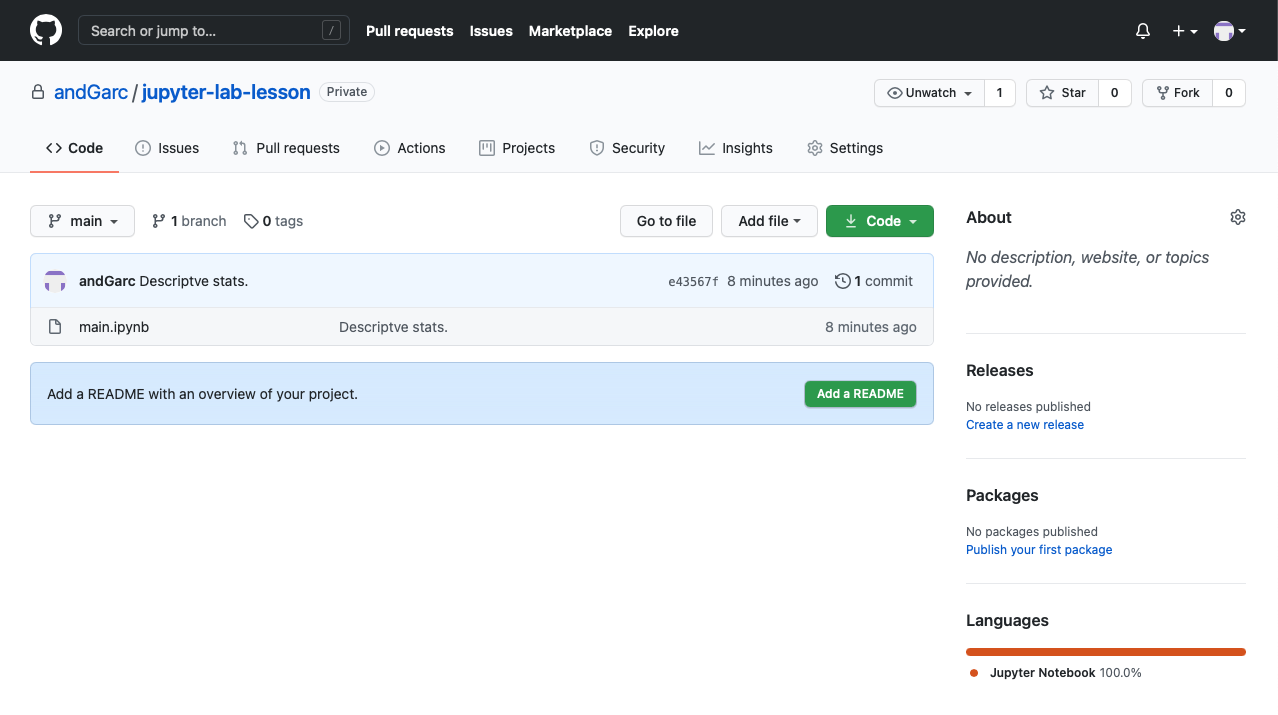
You can visit the project’s GitHub repository page and see your commits.
Congrats! You have succesfully cloned a repository and staged, committed, and pushed your local changes to it.
If you are confused about the differences between git, GitHub, Gitlab, please refer to SESYNC’s FAQ on git vs. GitHub vs. GitLab.
If you would like to use git with RStudio, check out our FAQ on creating an RStudio project within git.
If you need to catch-up before a section of code will work, just squish it's 🍅 to copy code above it into your clipboard. Then paste into your interpreter's console, run, and you'll be ready to start in on that section. Code copied by both 🍅 and 📋 will also appear below, where you can edit first, and then copy, paste, and run again.
# Nothing here yet!