SESYNC offers private git hosting through our GitLab server. When you connect to our GitLab Community Edition (CE) instance using your SESYNC username and password, you’ll see a dashboard of recent activity on projects that you are part of. If this is your first time connecting, it may be a little quiet.
There are two types of projects you can create in GitLab, personal and group projects.
If your SESYNC group does not yet have a GitLab group, you might want to create one. Creating a GitLab group has two main advantages: It helps you keep multiple repositories for your group’s project organized in one place, and it can also help you deal with permissions more easily by giving multiple people access to multiple projects all at once. See GitLab’s documentation on groups for more information about groups and how to create one on GitLab.
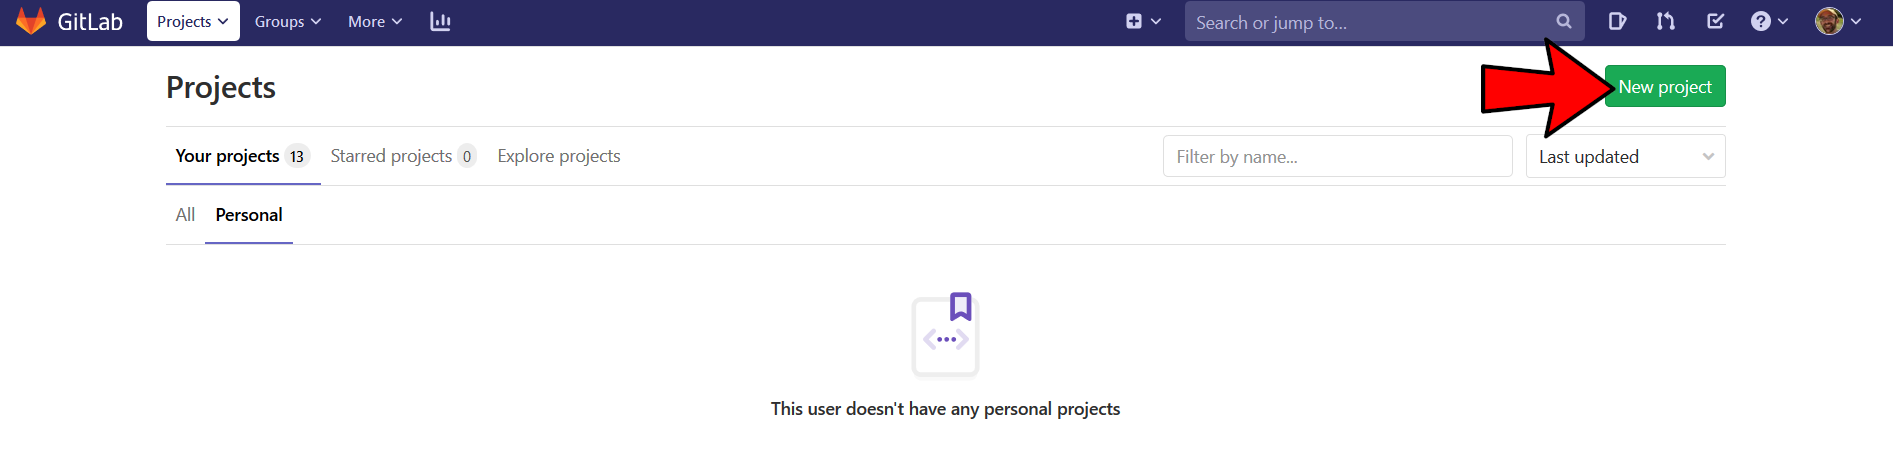
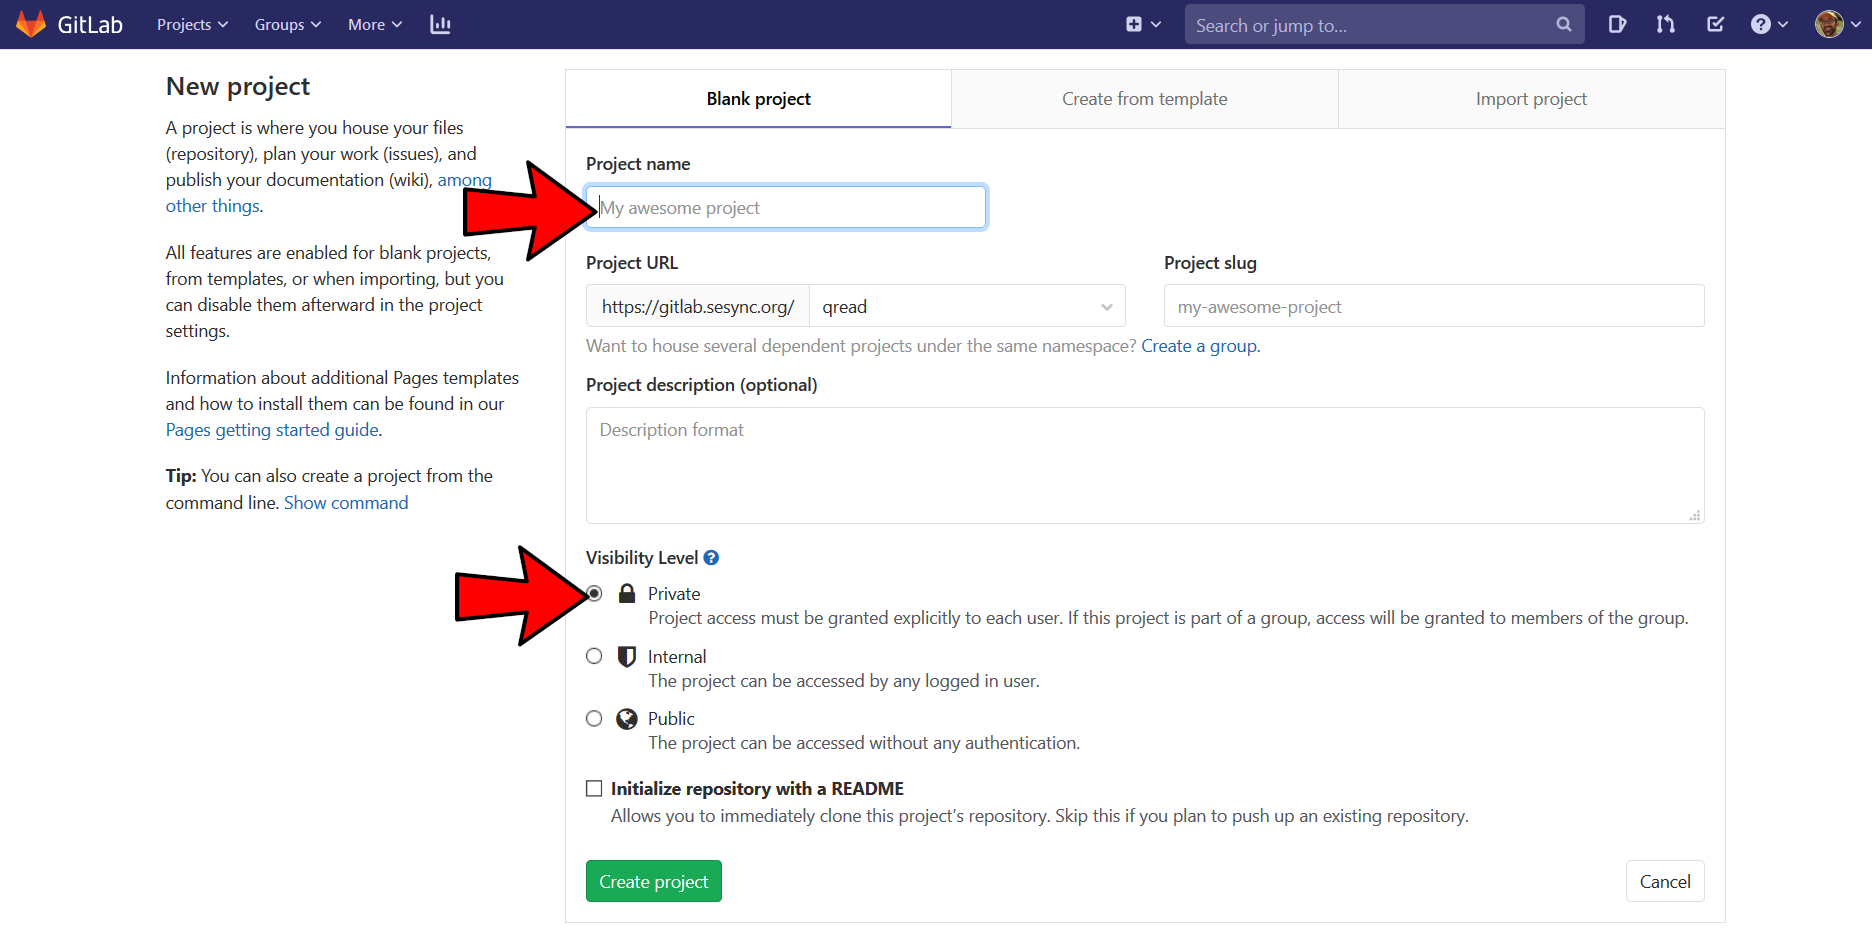
To create a project, click the new project either from the dashboard when you login for a personal project, or by clicking new project under a group for a group project. Enter the name, description and whether you want the project private, internal or public. Click create to finish creating your project.
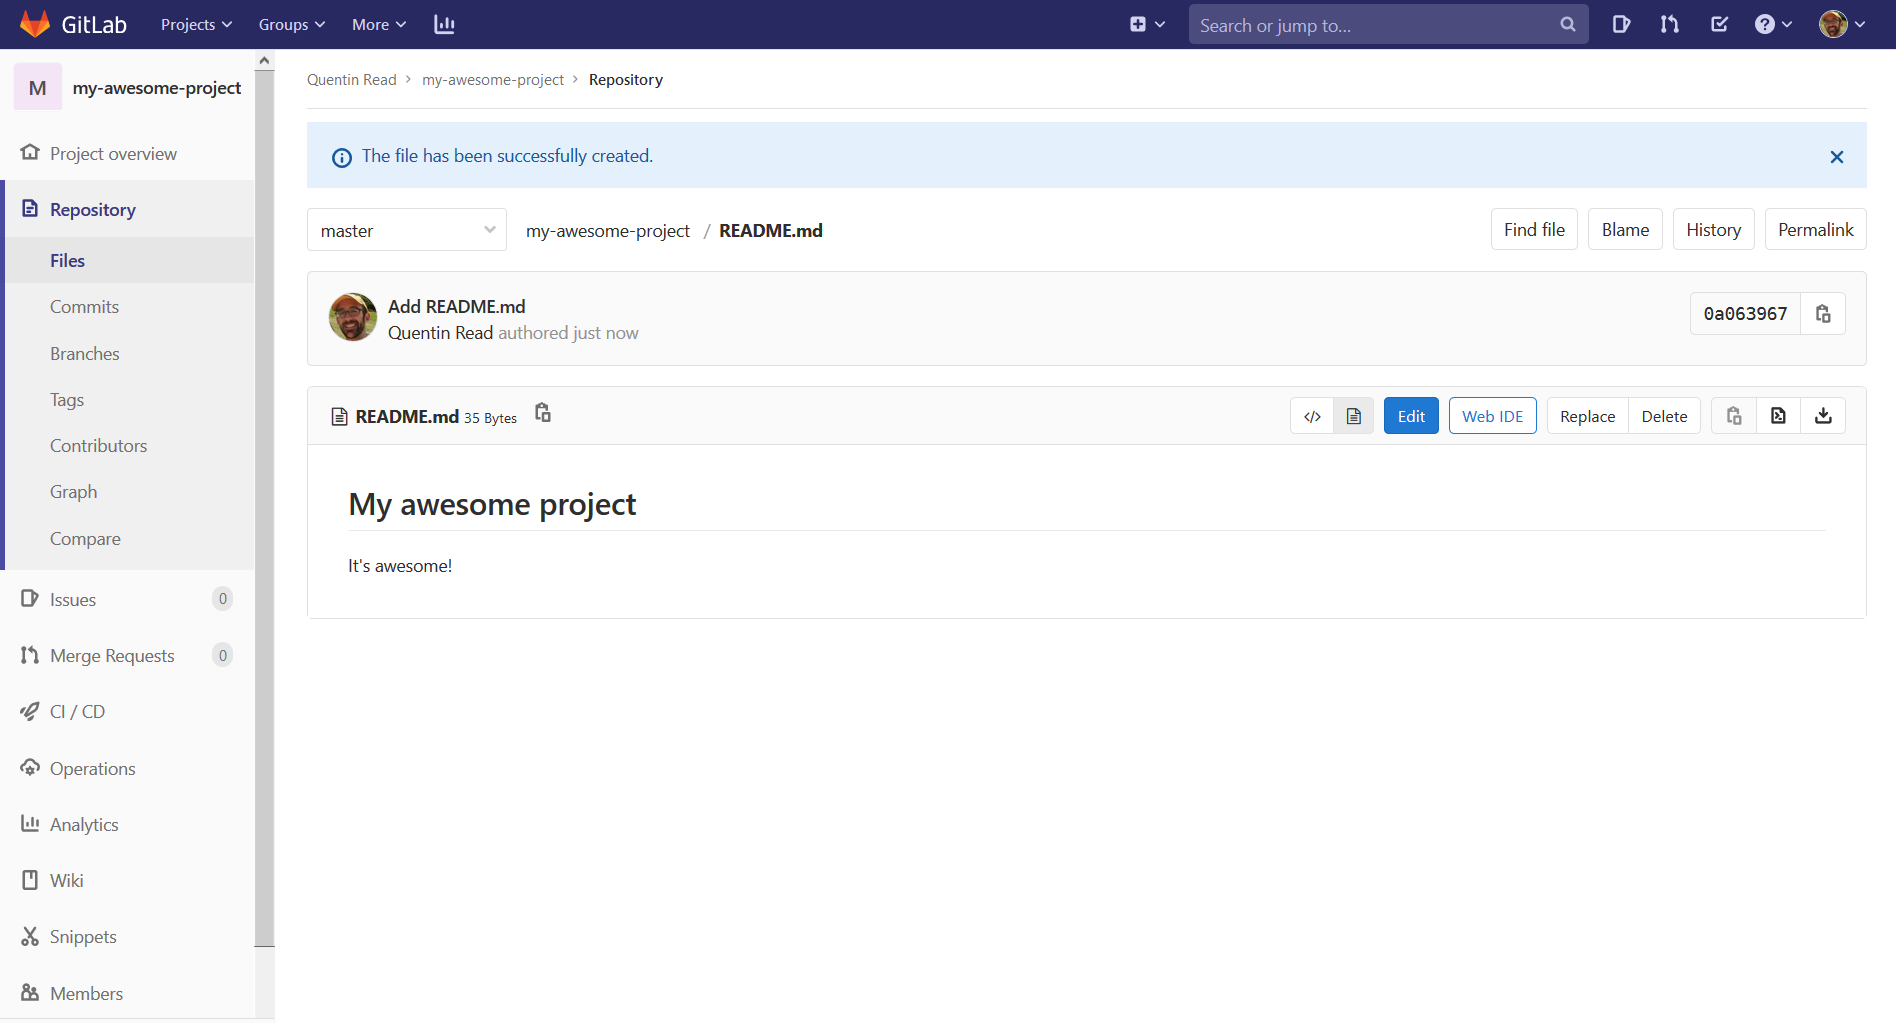
Your project is now created and you can load files into it. Follow the instructions to manually load data, or follow one of our tutorials such as How do I create an RStudio Project with git?
![]()
After your project is created, you can use the links on your project page to browse activity and files in your project as seen below.
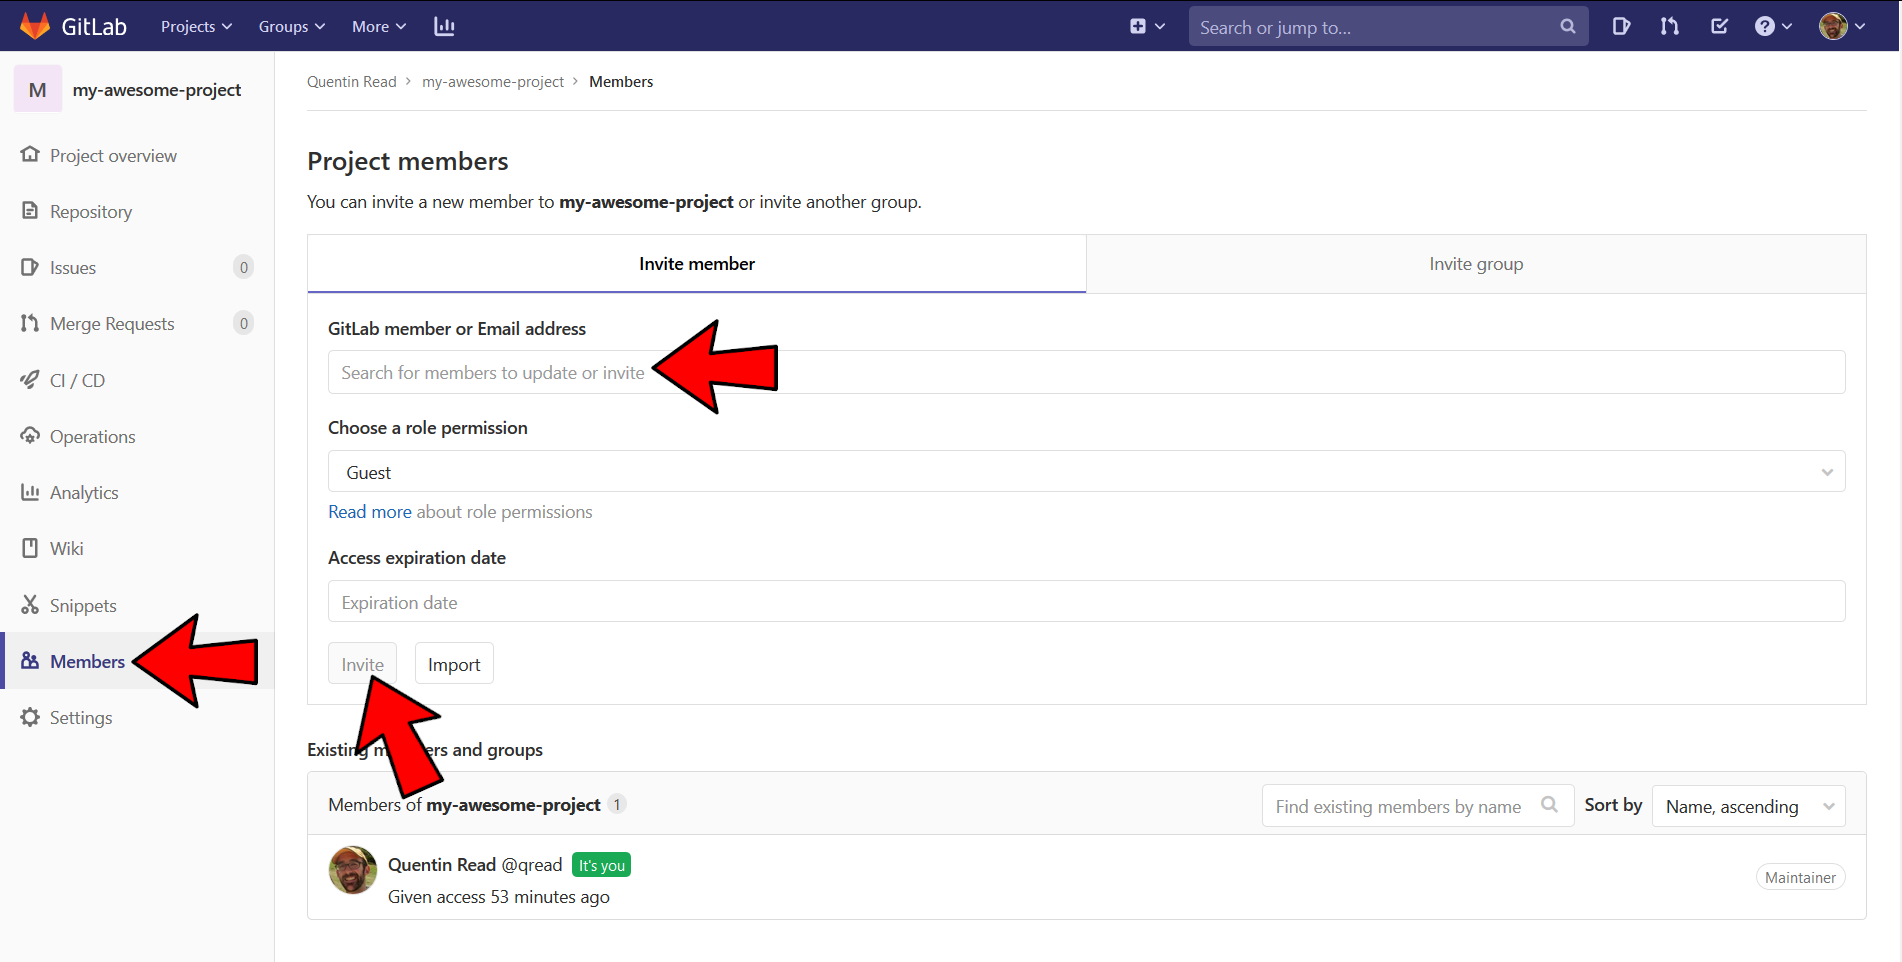
Privately sharing your GitLab project with collaborators requires that collaborators have a SESYNC account. Please contact cyberhelp@sesync.org if your collaborator needs an account.
From the dashboard of your project, click ‘Members’. You can share your project with new members or groups under the “Invite member” or “Invite group” tabs.
Under “Search for members to update or invite”, start typing the name of your colleagues and a matching account name should appear. If they do not, they probably haven’t logged in to gitlab.sesync.org yet. Drop them a quick e-mail asking them to login so you can grant access. You can shoose the level of access from the choices below.
Click ‘Invite’ at the bottom when you have finished. The next time your collegue logs in they will see the project in their dashboard.
HTTPS and SSH are two different protocols that let you securely push (pull) commits to (from) a remote git repository. HTTPS requires a username and password to authenticate, while SSH works with paired public and private cryptographic keys. You can use either one, but setting up an SSH key pair means never having to enter a username and password.
You can generate a key pair for any machine onto which you will clone your repository, but SESYNC makes it especially easy to use the SSH protocol for projects cloned to our RStudio Server from GitLab or GitHub.
git@) for <URL> in the R command system('git remote set-url origin <URL>').That’s it! You should be able to push and pull between your local git repository on https://rstudio.sesync.org and the remote git repository on GitLab/GitHub.
Bonus tip: You can also set up an SSH key on your local machine, if you want to work locally instead of on the RStudio server. See the FAQ on setting up SSH keys for more details.